Configuring eduroam on a Windows 7 PC
Automatic setup
The preferred method for configuring your device is to use the eduroam CAT (Configuration Assistant Tool) - this tool will automatically set your device up to use the eduroam network. To do this, go to the eduroam CAT page (http://eduroam.nerc.ac.uk/cat.asp) and follow the instructions appropriate to your device, rather than using the guidance below.
Manual setup
Only perform a manual setup if you experience problems with the automatic setup!
Certificate installation
If your laptop is a member of the NERC Domain you can proceed to step 1 below. If not, then you will need to download and install the NERC root CA certificate into the Trusted Root Certificates machine store. You can do this by clicking the following link and saving the file to a known location: NERC root CA certificate - external link (https://pki.nerc.ac.uk/NERC-2015-ROOT-CA.crt)
Locate the certificate, then right click on it and select Install Certificate.
Click Next at the first screen.
Select the Place all certificates in the following store radio button and select Browse.
Tick the box next to Show physical stores.
Expand Trusted Root Certification Authorities, select Local computer and click OK.
Click Next then Finish.
Connecting to the eduroam wireless network
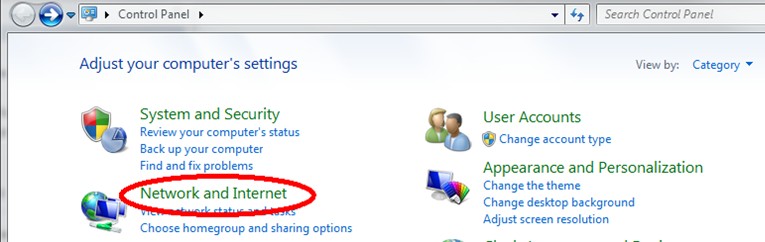
First open up Control Panel. This can be achieved by clicking the "Start Orb" then selecting Control Panel.
If your Control Panel is in "Category View" select Network and Internet, else select Network and Sharing Center and skip to step 4.
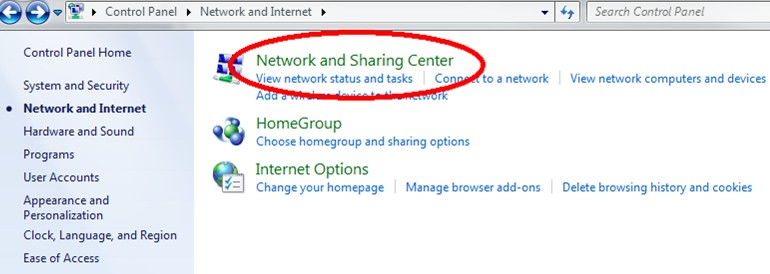
Select Network and Sharing Center.
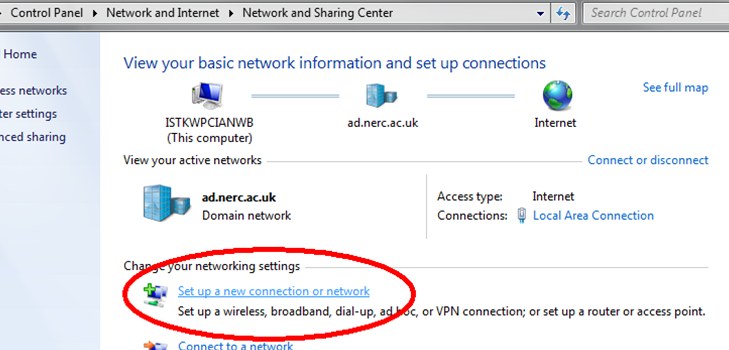
Select the link for Set up a new connection or network.
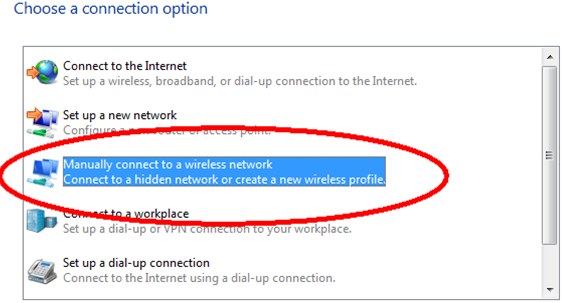
Select Manually connect to a wireless network.
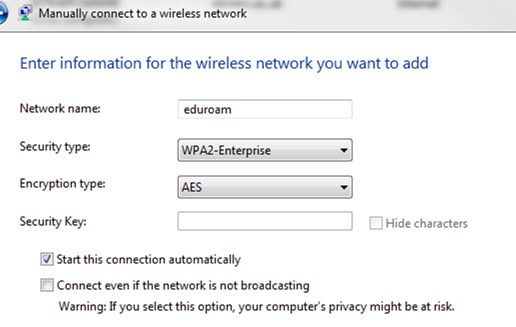
Ensure Start this connection automatically is ticked and enter the details below into the correct fields:
(ensure that "eduroam" is entered all in lower case!).Network name: eduroam
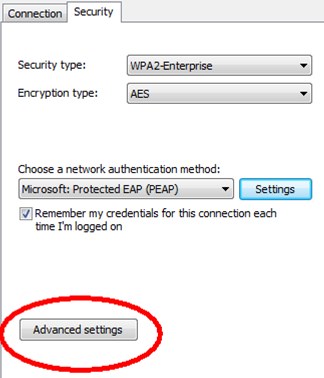
Security type: WPA2-Enterprise
Encryption type: AESClick Next once complete.
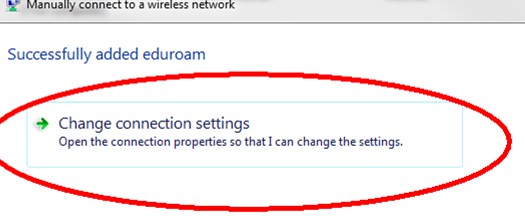
Click the button labelled Change connection settings.
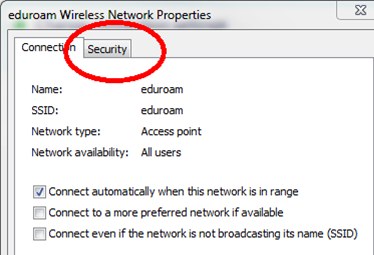
Select the Security tab.
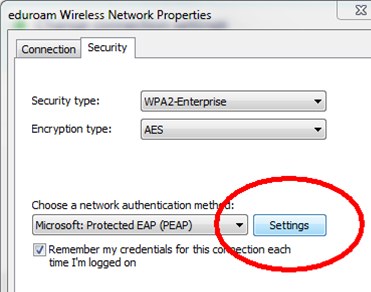
Click the button labelled Settings.
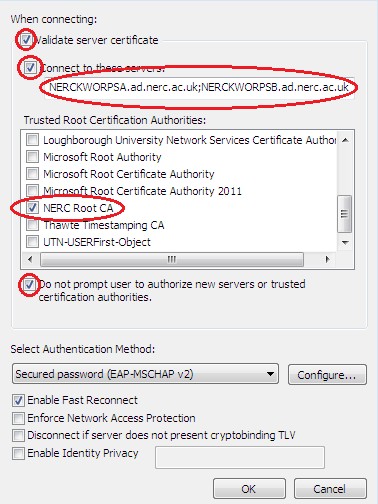
Ensure that the following tick boxes are checked: Validate server certificate and Connect to these servers.
In the text box below Connect to these servers enter "NERCKWORPSA.ad.nerc.ac.uk;NERCKWORPSB.ad.nerc.ac.uk" (without the speech marks and ensuring there is a semi colon and no spaces).
Under the heading Trusted Root Certificate Authorities scroll down and ensure NERC-2015-ROOT-CA is ticked and that all others are unticked.
Tick the box Do not prompt user to authorize new servers or trusted certification authorities.
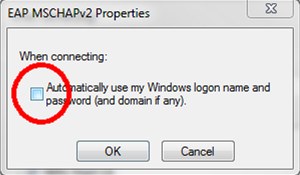
Under the heading Select Authentication Method click Configure....
Remove the tick for Automatically use my Windows logon name and password.
Select OK and then OK again.
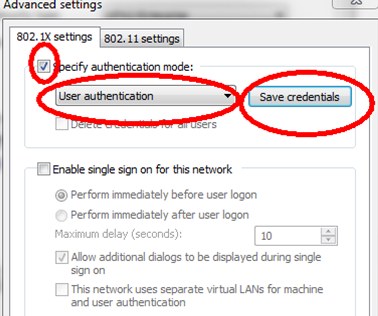
Click the button labelled Advanced settings.
Ensure the tick box for Specify authentication mode is ticked then select User authentication from the drop down below it.
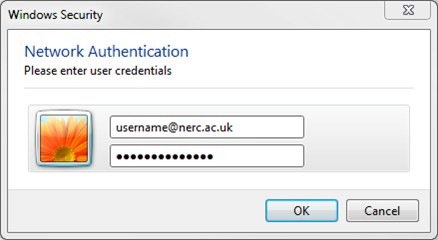
Click the Save credentials button to the right.
Enter your NERC Office 365 logon username and password. For example:
- My.Name@nerc.ukri.org
- fhdg@bas.ac.uk
- cjie@bgs.ac.uk
- abde@nerc.ac.uk
Note: For most people, this is your email address. Please contact your local IT team if you have any questions.
Click OK then OK again and finally Close to finish.
Your Windows 7 laptop should now automatically connect to the eduroam network.